A roof that stops against a wall, or wraps round a chimney, leaves a long joint that lets rain in unless it is flashed. On a flat edge the joint is a straight line. On a pitched roof it is a slope, and the brickwork above it is built in courses, one layer on top of the next. A flashing for that joint cannot be a flat strip. It has to step up with the brick.
Step flashing does exactly that. Lead is cut and folded so that each step tucks into a horizontal joint of the brickwork and lies over the roof covering below. In many setups a second layer, the cover flashing, laps over the top of the first to protect the junction between the lead and the tiles or slates.
This guide explains where stepped lead is used on Andover-area houses, how the pieces fit together, what the chase and wedges do, which faults to look for and what the work involves when it has to be replaced. Words like soaker and chase are explained as they come up.
Where stepped lead is used
Step flashing belongs wherever a sloping roof edge meets a vertical wall, and the pattern is common on ordinary houses.
Chimney sides
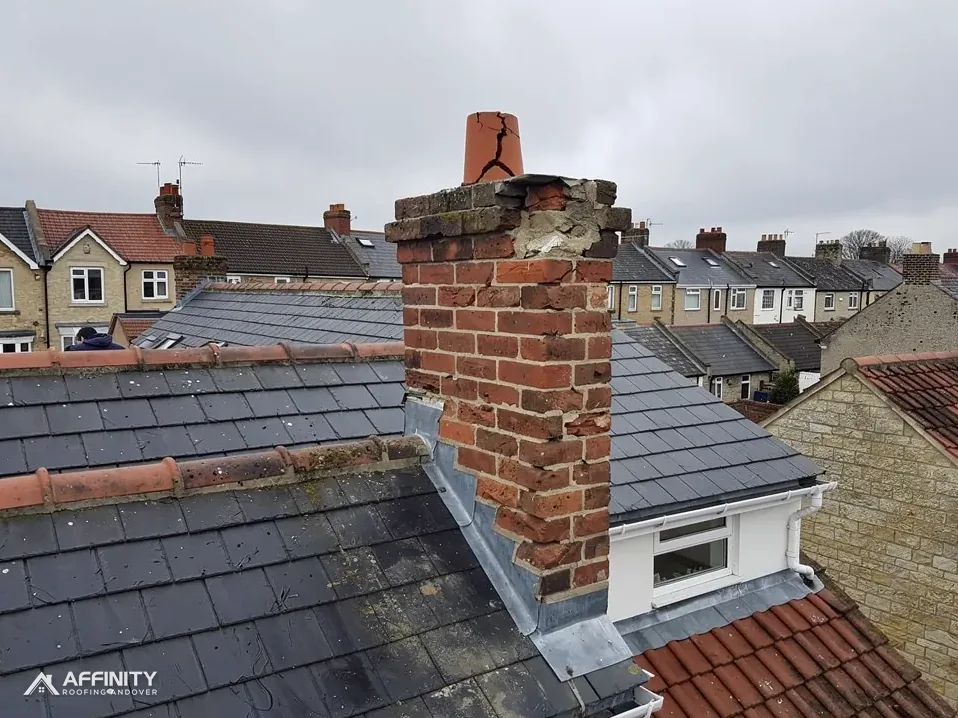
Each side of a stack that stands on the slope has to be flashed along its length. The two sloping sides take step flashings, while the downhill face is covered by a flat apron and the uphill face by a back gutter. Our guide to chimney lead flashing covers the whole set.
Side walls of extensions and dormers
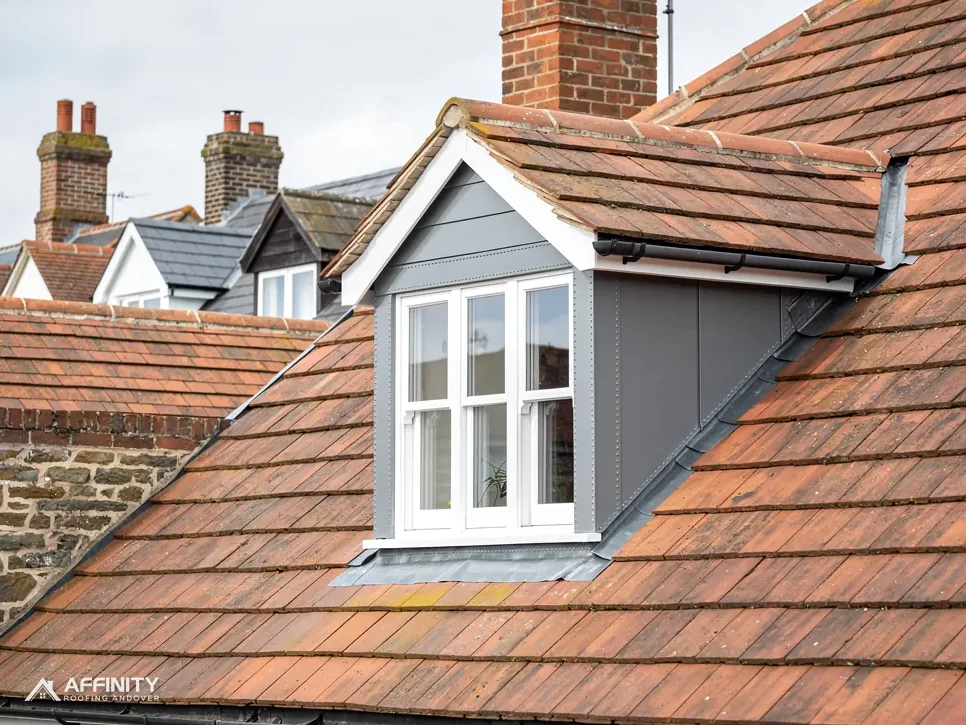
When a lean-to roof or an extension meets the taller wall of the house, the junction runs up the slope in the same way. The same is true on the cheek of a dormer, where the vertical side face of the dormer meets the main roof. Lead dormers repeat the same pattern on both cheeks.
Party walls and gables
A terraced or semi-detached roof where the party wall rises above the tiles has a long run of stepped lead, called an abutment flashing, along the slope. The same applies to the verge of a roof that butts a gable of a neighbouring building.
Not every slope needs steps
On a flat roof against a wall, a straight apron or upstand does the job. Steps are for sloping junctions. On a lean-to with a very shallow pitch, the steps are tiny, but the principle holds. Shed roofs, porches and garage lean-tos all use the same idea at a smaller scale.
Reading your own roof
From the garden, you can often spot the stepped line as a sawtooth of grey metal climbing the brickwork beside the tiles. If the line is a single ribbon of metal stuck on with a bead of mastic and no chase, the roof may have been repaired badly at some point. A step flashing zigzags in time with the brick courses.
Step flashing and cover flashing: the difference
The two terms describe different pieces that often work together, and mixing them up causes confusion in quotes.
Step flashing
A step flashing is a series of lead pieces cut in steps. Each step is turned up the wall into a joint in the brickwork and turned down over the roof covering. Because every step follows one course of bricks, the joint stays tight no matter how steep the slope.
Soakers
On tiled and slated roofs, small pieces of lead called soakers are slipped under each tile or slate at the edge, turned up the wall and covered by the flashing. In Royston Lead's cast-lead brochure, code 3 is for soakers only and code 4 also covers soakers, flashings and other uses. Each soaker is interleaved with the courses of tiles, and the step flashing overlaps its upturned edge. Our answer on lead soakers explains them in full.
Cover flashing
A cover flashing is a strip of lead whose job is to hang over another layer and shield its upper edge. On a stack, the lead turned into the chase and dressed down over the underlying soakers or upstand does that cover job. On a roof where a separate upstand has been formed, the cover flashing is the part that hides and protects it. The two together make a two-layer joint that stays dry in a way a single strip cannot.
When a quote says "stepped flashing and soakers", it describes the full two-layer system, not a single line of lead.
The chase, wedges and pointing
A step flashing is only as good as its top edge. The top edge is where it meets the wall, and that is the edge to check first.
What a chase is
The chase, sometimes called a raggle, is a slot cut into the masonry to receive the turned edge of the lead. On a stepped run, it is cut as a series of short horizontal grooves, one per course, or as a single raking cut that follows the slope. The edge of the lead is bent to fit and pushed into the groove.
What wedges do
Lead wedges are small folded strips tapped in beside the turned edge to keep it tight. They stop the lead pulling out as the roof moves. Without them, the lead gradually drops and the joint opens, which is a common reason for a leak at an abutment. Our guide to why sealant is not a lead repair explains why gluing the edge does not stand in for them.
Pointing
Once the lead and wedges are in place, the chase is filled with mortar or sealed in a way that suits the wall. The pointing sheds water from above and keeps the lead in place. It also has to match the old brickwork, which matters on a house in a conservation area.
Standards
For lead sheet, Approved Document C (para 6.9) points to BS 6915, and the detailing follows it.
Common faults at stepped joints
Because a step flashing is a long run of repeating pieces, faults tend to show at certain points.
Lead that has slipped
The turned edge pulls out of the chase, usually because the wedges were missing, too few or lost over the years. The flashing then sags and gaps open along the wall.
Splits at the folds
Every step has a fold, and the folds take the most bending. Lead that is too thin for the situation, or that has been folded too many times in repair, cracks along them. A split at a fold lets rain straight through to the soaker below.
Crumbling mortar
If the pointing has failed or the bricks have spalled, the chase no longer holds. The lead may be perfectly good, but the wall around it is not. The wall must be repaired before the lead can be fixed again.
Missing soakers
On older roofs, soakers are sometimes absent or have been replaced by a smear of cement. The flashing then has nothing underneath, and rain runs behind the junction. This is hard to see from the ground and obvious once the tiles are lifted.
Sealant patches
A line of sealant along the top edge hides a gap and traps water. It is a clear sign that a flashing needs proper attention. If you are seeing damp at the wall in the room below, that junction is the place to look.
How a stepped flashing is replaced
Replacing a stepped flashing is careful work, because it sits at the edge of a roof covering that has to be disturbed.
The sequence
The tiles or slates along the junction are lifted and set aside. The old lead and soakers come out, and the chase is cleaned and re-pointed or re-cut if needed. New soakers are interleaved with the courses as the covering is relaid, and the new step flashing is dressed over them and into the chase. Wedges are driven in at regular intervals, the chase is pointed and the covering is checked against the finished lead.
Choosing the code
The Royston Lead brochure shows flashings in codes 4, 5 and 6 and soakers in codes 3 and 4. We set the code according to the exposure and the length of the run, and it goes into the written price.
Matching the covering
The tiles beside the junction must be handled carefully, since old tiles can be brittle. Where they break, replacements are matched as closely as possible. Our guide to lead roofing shows the other joints where stepped lead appears.
How long it lasts
MyJobQuote gives lead flashing a life of over 80 years, a lower bound, so a well-made stepped flashing can outlast many coverings, though natural slate can last longer still. The condition of the wall and the quality of the wedging decide whether it does.
Cost, consents and what to ask
Stepped flashing is part of the leadwork at a chimney or wall, and its cost depends on the length of the run, the code and the access.
Published figures
MyJobQuote gives full chimney leadwork as between £350 and £920, with the figure depending on scaffold (22 September 2026). That is a typical UK range, and it covers all faces of a stack, not just the stepped sides. A long abutment along a party wall may sit outside it. The survey measures the run and the written price follows.
Consents
Replacing lead in the same pattern is like-for-like work. If your home is listed, works that affect its character need listed building consent, and in a conservation area check with the council's planning team whether an Article 4 direction applies before any detail is changed.
Questions to put to a roofer
Ask what lead code is going on, and whether new soakers are part of the job. Ask how the top edge will be fixed and whether wedges will be used, and whether the chase will be re-pointed. A good answer names each of those. Ask for photographs of the old flashing and of the chase once the old lead is out.
Photographs as a record
The photographs show you what was behind the old lead and give a record for any later owner of the house. Keep them with your other papers for the house, alongside the written price. When the property is sold, a buyer's surveyor may ask about the age of the leadwork, and dated pictures answer the question quickly and without argument.