A roof window is only as watertight as the metalwork round it. The glass and frame are factory-made and tested. The bit that depends on the roofer is the flashing: the set of pieces that bridge the gap between the window frame and the roof covering, guiding water over the top.
Manufacturers sell these as kits, matched to the type of covering. A kit for flat slates is not the same as a kit for deeply profiled concrete tiles, and a roof that has been re-covered since the window went in may now need a different one. Fitting the wrong kit, or an old one reused, can cause a leaking window.
This guide explains how a flashing kit works, how profiled and flat coverings change the choice, where lead comes in, how the surrounding tiles are made good, and what to ask the installer. It applies to a new window or to a replacement, and it matters more than any other single detail of the job.
The kit is also an easy part to skimp, because it is hidden once the tiles are back. A short conversation about it before the job begins is good value.
What a flashing kit does
Flashing is the general word for a strip of waterproof material that covers a junction in a roof. Around a roof window, several pieces work together.
The parts
The bottom piece, often called the apron, sits below the window and carries water that runs down the glass out and over the tiles beneath. The side pieces, or side flashings, channel water down the left and right edges. The top piece, the head flashing, diverts water that arrives from higher up the roof around the window instead of onto it. In a full kit, corner pieces and a soaker tray complete the seal. A soaker is a flat piece of metal folded to lie under the covering and over the frame.
How they work
Working from the bottom of the window upward, every piece overlaps the one beneath, so gravity always delivers water onto the next surface. Nothing relies on sealant alone. The pieces are shaped to the covering so that the tiles or slates sit on or under them correctly.
What sits behind
Behind the flashing, the underlay is turned up against the frame and its insulation collar. Any moisture that slips beneath the covering then drains down the inside of the metalwork and exits at the lower edge, away from the room.
Why a kit and not a one-off
A manufactured kit is tested with its window. A hand-made substitute may work in skilled hands, but it should be as good as the kit it replaces.
Read this alongside our guide to why a roof window leaks, which shows how a failed kit looks from inside, and our roof windows and skylights page for the wider picture.
Profiled coverings versus flat ones
The shape of the covering decides the shape of the kit. The two broad families need very different flashings.
Flat coverings
Plain clay tiles, flat concrete tiles and natural slates have a flat or slightly curved face. A flashing can lie close to them, and a thin kit with a shaped apron is enough. Slate kits often include special soakers to suit the way slates overlap.
Profiled coverings
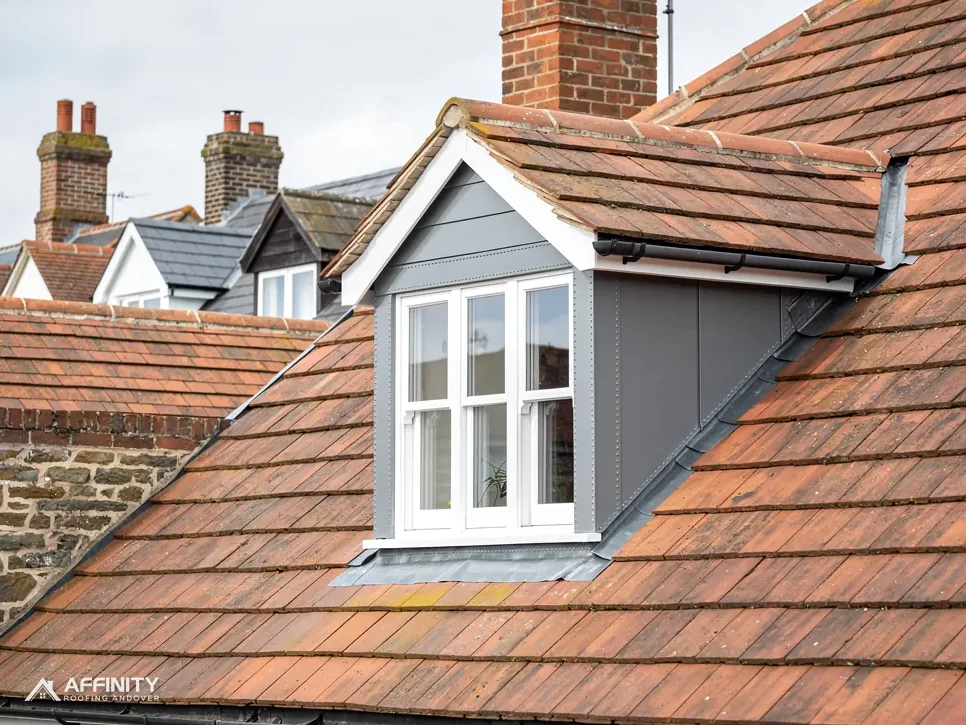
Pantiles, Double Roman tiles and other deeply profiled interlocking tiles have high ridges and low troughs. The flashing has to bridge the gap between the window and the high points of the tile, and the troughs would let water in underneath if left open. Profiled kits are made with a deeper, formable apron and special side pieces that are dressed into the tile profile, often with a flexible filler strip.
Why one size does not fit all
A kit sold for a 40 mm profile does not suit a 20 mm one. The height of the covering above the battens matters, and the kit has to match it.
Re-covered roofs
If a roof was re-tiled in a different profile after the window was fitted, the old kit may not fit. The same goes for a window that has been moved from one roof to another.
Pitch
The covering has a minimum pitch, and the window and kit must suit the slope as built. Marley's data lists minimums from 12.5 degrees for some concrete tiles to 35 degrees for its plain tile, and natural slate needs 20 degrees under BS 5534.
The best advice is to give the installer the make and profile of the tile, or a photograph of the roof, before the kit is ordered.
Lead aprons and where lead belongs
Lead has long been the roofer's answer to awkward junctions. It is soft enough to dress into profiles and durable enough to outlast most coverings.
Why lead at the apron
The lower edge of a roof window is where the most water arrives, and where the covering below has to be sealed to the frame. A lead apron moulds to the tiles below and can be dressed over the profile. For deeply profiled coverings it is often the only material that fits well.
Lead sheet codes
Lead is sold by code, which is a thickness and weight. Royston's brochure lists code 3 at 1.32 mm for soakers only, code 4 at 1.80 mm for soakers, flashings, valley gutters and dormers, and code 5 at 2.24 mm for flashings, valley gutters, parapets and dormers. Higher codes are thicker and used for gutters and heavier work. Approved Document C refers to BS 6915 for recommendations on lead.
How long it lasts
MyJobQuote's page on leadwork gives over 80 years for lead flashing (22/09/26). That is a lower bound, not a guarantee. It can outlast the tile it sits under, which is a reason to reuse sound lead on a new covering.
Other metals
Aluminium and coated steel kits are supplied by window makers and suit many coverings. They are lighter, cheaper and tested with the window, but less forgiving on awkward profiles.
Quality of fitting
Lead is worked by hand. Corners must be dressed, not just folded, and laps must be generous. A neatly dressed apron is a mark of care.
Our lead roofing page explains more about the material.
Making good the tiles around the window
When the flashing is in, the covering has to be put back, and this is where the finished look is decided.
Lifting and relaying
The covering around the opening is lifted before the frame is fixed. After the flashing is dressed, they are laid back in courses, cut where they meet the window frame and flashing. Cut edges should be neat, and the nibs or fixings must be right.
Battens
The battens beside the frame are inspected. Soft or split ones are renewed, and extra battens go in around the opening to carry the cut tiles.
Broken and missing tiles
Some tiles break during lifting, especially on older roofs where the nibs are brittle. A good crew keeps spares, and tells you if tiles of the right type are no longer made. Matching old tiles is covered in our guide to partial roof replacement.
Underlay and laps
The underlay is re-lapped around the frame so that it laps over the flashing at the top and under it at the bottom. A torn or missing piece is replaced.
Fixings
Tiles beside a cut should be fixed in line with BS 5534:2014+A2:2018. Marley observes that the standard is not enforced by law, and we still fix the tiles round a roof window to it.
Cleaning up
Debris, nails and broken pieces should be cleared from the roof and gutters. The flashing should be left clean and free of marks.
The finish should look like the rest of the roof. If it does not, ask for it to be put right before the scaffold or ladders go.
Common faults and how to avoid them
Most flashing failures trace back to a short list of causes. Knowing them helps you ask the right questions.
Wrong kit for the covering
A flat-tile kit on a profiled roof leaves gaps under the apron. The result looks fine from the ground and leaks in heavy rain.
Old flashing reused
A kit that has been through one installation may be distorted, cracked or corroded. Reusing it saves money in the short term and costs more later.
Sealant as a cure
Mastic or silicone round the edges is not a flashing. It can seem to work for a season before cracking, and it hides a fault instead of curing it.
Wrong laps
If a piece is lapped the wrong way, water runs under it. Each piece must lie over the one below.
Missing underlay dressing
If the underlay is not dressed into the frame, water that gets past the covering goes straight into the room.
Damaged battens or rafters
Soft timber around the frame can let the window move, which breaks the seal.
How to avoid them
Ask which kit will be used, and whether it is new. Ask whether lead is used at the apron. Ask for photographs of the flashing before the tiles go back, since after that nobody can see it.
These questions cost nothing and tell you a lot about the care the firm takes. If you are replacing an old window, the guide to replacing a roof window like for like sets out the full sequence.
What to ask the installer before you agree
A few plain questions settle most doubts and give you a clear picture of the work.
- Which flashing kit suits my covering, and who makes it?
- Is it a new kit, and does it come with the window?
- Will lead be used for the apron, and what code?
- What happens to the tiles around the window, and who makes good any breakages?
- Will I see photographs of the flashing before the tiles go back?
What should be in the price
One written total should cover the window, the kit, the flashing work, the making good of the covering and the removal of waste. Ask whether scaffolding or access equipment is included, and whether VAT is. Citizens Advice suggests getting at least 3 written quotes, so use the same questions with each firm.
What to expect afterwards
Check the ceiling and the lining below after the first heavy rain. A damp patch in the first weeks is easy to deal with. Tell the firm promptly, with a photograph.
Maintenance
Look at the flashing from the ground once a year, if you can see it, and clear leaves and moss from the gutters and the roof around the window. Do not climb onto the roof.
Costs
MyJobQuote's roof window page gives around £1,100 for a standard mid-range unit and about £100 less for a straightforward swap (22/09/26). The flashing kit is part of that job, not an extra to be quoted against it. Our guide to the cost of replacing a roof window explains what moves the price.
We identify the covering at the survey, before the kit is ordered, and the written price then takes in the whole job.